Saturday, February 27, 2010

Fabric Squares


My kitchen needed a face lift. Beige walls were dreary and boring to look at.
Last weekend, I had the crazy idea to paint it teal with one red wall. About halfway into trimming, I turned to my husband and told him I absolutely hated it. He told me to finish painting, and if we still hated it we could always get a new paint color.

I am so glad I listened, because I love it. One of the things I really wanted was a place for my son's artwork from preschool. A good friend of mine, Natalie, had these fabulous squares of varying fabrics in her kitchen, so I thought I would give it a try.
**Tips:

  • They sell a set of four 12 by 12 cork boards at Michael's for around $6.
  • Each square takes around 16 by 16 inches of fabric for covering.
  • Having too much fabric made it more difficult to give the corners a smooth and finished look.
  • A staple gun was my device for holding the fabric in place, but I have also seen other's use hot glue.
  • One nail dead center keeps them in place perfectly.

I love how much color and vibrancy they add to my kitchen wall. I plan on adding an Uppercase Living wall art above it--I will snap a picture of it when I am finished.

Happy Weekend!

Wednesday, February 24, 2010

Winner is...

the winner of the guitar onesie is #23

Champagne Wisdom

I am contacting you now to get your address! Thanks to all who participated! I have another great giveaway coming up soon (hint: from the makers of K Bella Bambino- one of my favorite kid's clothing lines), so please stay tuned!

WIN IT


Over at SkiptoMyLou.org , I am giving away a Wet Happened? wet bag, your choice of either a tie onesie or bird applique onesie, and a sock diaper cupcake. Retail Value $46.

See details there for entry. Good luck!

Wednesday, February 17, 2010

A new hat

Could this hat be any cuter?

Didn't think so.

From the same mom manufacturer that makes the crochet baby shoes, this adorable crochet hat come with a variety of flower options. Retails for $28.

Tuesday, February 16, 2010

Off to the Big Apple

I have always wanted to visit, and this week I will get my chance.

As such, I will be closed for the rest of the week. Any order placed after Tuesday will get processed when I return on Sunday.
Thanks for your understanding!

Sunday, February 14, 2010

Dylbug:: Personalized Onesies


I am just loving the new onesie line I added from Dylbug. I wish I would have know about these when Bryce was born, because I would have loved to put him in the Baby Name onesie with a pair of cute babylegs. Many styles to choose from, see them all here in the new product section.

Saturday, February 13, 2010

Tip of the Day: For Moms of Boys


We have a problem here at the MiniMe BabyGear house.


One of epic proportions.


Try as I might, day or night, I cannot get the little boy stink out of my bathroom.


I clean and clean, and the smell remains. There is some pee somewhere, I just can never find it to eliminate the smell. The walls, base of the toilet, even under the toilet have been scrubbed, and still I cannot ward off that smell.


Enter: Scrubbing Bubbles.


I hosed down the entire bathroom yesterday, and it is the first time in two years I cannot smell pee.


Just in time for me to start potty training boy #2.


:-)

Tuesday, February 9, 2010

Rock it like The Who

...or maybe not.

Some halftime show with 64 year old rock stars, huh?

WIN IT

Your little rock star will look adorable in this Appliqued Tee by Very Kiki (size 6 months):

To enter, leave a comment with your favorite band of all time. Is it the Beatles, is it Aerosmith, or is it someone obscure like Sister Hazel (my personal fave)?

Funny answers appreciated, but winner drawn randomly.

Rock on, friends, and good luck.

Monday, February 8, 2010

Last Day for Free Shipping

Just a friendly reminder that today is your last day for free shipping with code FREESHIP.

Saturday, February 6, 2010

Valentine's Cupcakes


For as much as I hated Valentine's day when I was growing up, I really like it now.
Kayden heads off to school to receive little notes and treats from all of his friends.
Just seems like fun, doesn't it?
Although I must admit, it scarred me forever when the boy I had a crush on spelled my name Gummie in fourth grade.

Thursday, February 4, 2010

Cupcakes


I made these cupcakes for preschool a while back. My mom was watching the boys, so I had a little extra time.
**Tip: Having black and white icing in cake decorating bags handy from the beginning. I tried to do that step last, and had to take candy off which was a mess. Supplies Needed:


Lion Face
String Licorice, cut into varying lengths
Two Plain Green M & Ms for the Ears
One Peanut Orange M & Ms for the nose
White and Black frosting for eyes and mouth

Turtle

One Green Peanut M & Ms for the face
Three Plain M & Ms for the spots on the shell
Four Plain M & Ms for the feet
This was one of the last ones I completed. I considered using black icing to draw out a shell, too, which would be cute.
White and black frosting for eyes and mouth


Bee
One York Peppermint Patty, cut in half
One Yellow Peanut M & M for the face
Black Icing for the Lines and Eyes


Ladybug
One Reeses Peanut Butter Cup for the Face
Five Brown Peanut M & Ms for the spots
Black icing for the line down the center
White and Black icing for the face

Fishing Pole
One Pretzel Stick
One Goldfish
Black icing for the fishing line


Pig
One York Peppermint Patty for the Nose
White Frosting for the nose holes
Two small red licorice pcs. for the ears
Black and White frosting for the eyes


If you do decide to make them, send me a picture! I would love to see your creations!

Wednesday, February 3, 2010

All my LEGO lovers

While searching for cool molds, I came across these:

They usually retail for $7.99 at the LEGO store, but online is sold out. I was really wanting to try a few things- Jello, ice, gummy candy, crayons, so I did some digging and found them on Amazon for $24.99.

Triple the price? Not happenin'.

I then stumbled upon the coolest place. Thank God Kayden is not old enough to surf the net, or I am sure my credit car would be maxed.

Brick Link is the unofficial marketplace for LEGOs. I ended up finding two of the ice cube trays on there for $9.00 shipped. One word of caution- some of the sellers are international, so the shipping can get pricey. Any and all LEGO set you could ever dream of is on this site.

Tuesday, February 2, 2010

Upcycling Crayons:: making crayons into fun shapes

First, I must give credit where credit is due. I got this idea from here, and thought it would be an easy and cute Valentine's project.

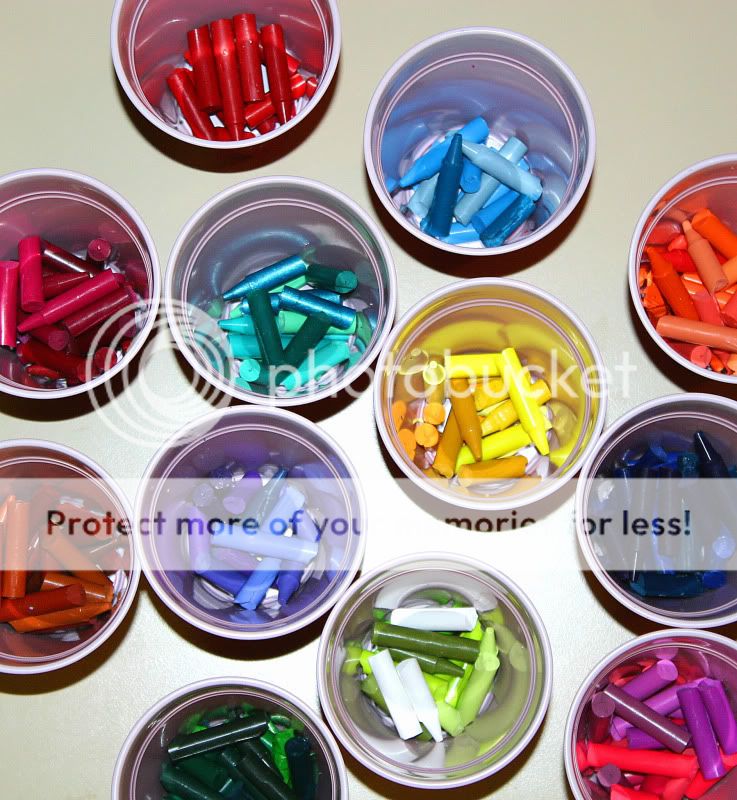
We had quite a few crayons shoved in every nook and cranny of the playroom. This lot was yielded from about 100 crayons.

Directions for Upcycling Crayons:

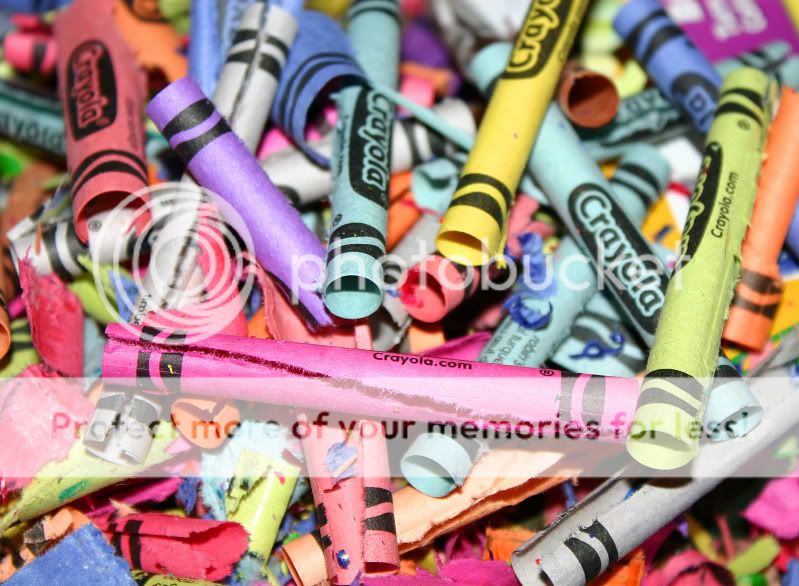
1. Gather Crayons. Half Chewed ones are still okay to use.

2. Peel off paper. Be prepared for your fingernails to look like you work at Muffler Man.

**Helpful Hint: around crayon 85, I finally got smart and realized the trick to successfully un-peeling crayons. Take a sharp knife, turn it upside down, and slip the tip right inside the seam. It leaves a small slit in the crayon, but the peelings come off in one big hunk.


3. Separate by Color


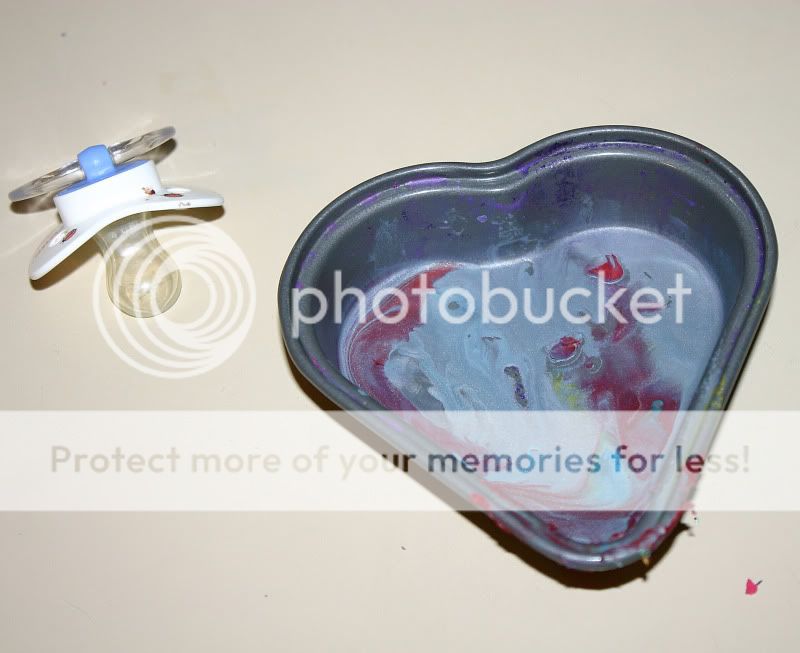
4. Melt Crayons. This was the trickiest part for me.

I tried:: Styrofoam cups in the microwave and oven, six ramekins (also melted in the oven), shattered two glass cups in the microwave, and generally made a huge mess.

This small pan above (with Bryce's paci as a reference point) is the perfect size for crayon melting. I lined it with aluminum foil and changed the aluminum foil with each color change. It was small enough that I could still pour the melted crayons into the molds.

You are going to want to watch the crayons closely. The liquify quickly.

In the microwave, it took around 5 minutes on high for all particles to be fully melted.

In the oven, it took around 8 minutes at 350 degrees.

5. Stir. How much stirring needs to be done depends of if you would rather have one solid color or a swirled look to your finished crayon. I did some of each and like both.
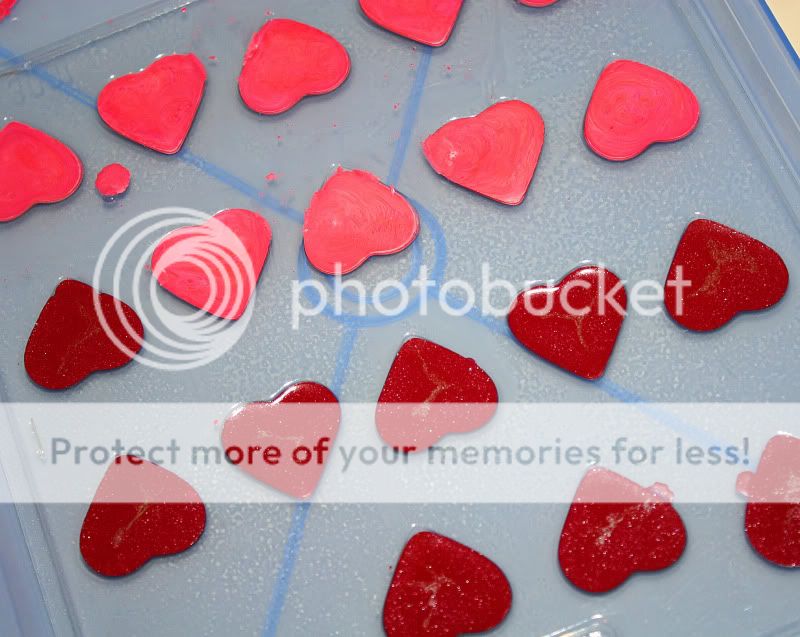
6. Pour into the mold.

**Tip: a VERY light coating of non-stick spray makes the entire process run a whole lot smoother. The crayons and extra splatters pop off so much easier.

**Tip: Speaking of splatters....at first, I was very careful to not drip. Dripping is okay, and can easily be fixed with a sharp knife. Once the hearts had hardened, I took the edge of the knife and cut off all of the imperfections.

**Tip: Find unique molds at Hobby Lobby, Michaels, Walmart, or here. Most run about $1.99.

I also got this tractor mold and a few others to try out.

7. Let harden. I am not a patient person and I only had a few molds, so I put them in the refrigerator to quicken the hardening process.
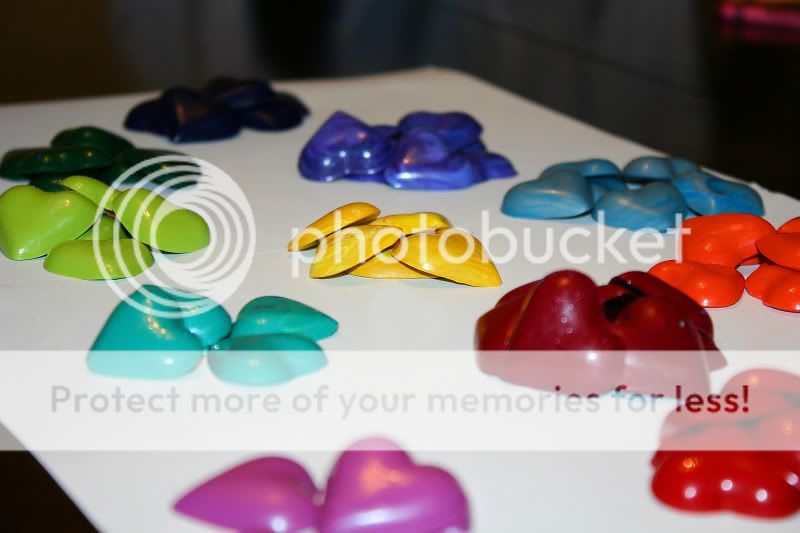
8. Cut off any excess.

9. Make sure your two year old doesn't mistake it for candy and try to eat it.

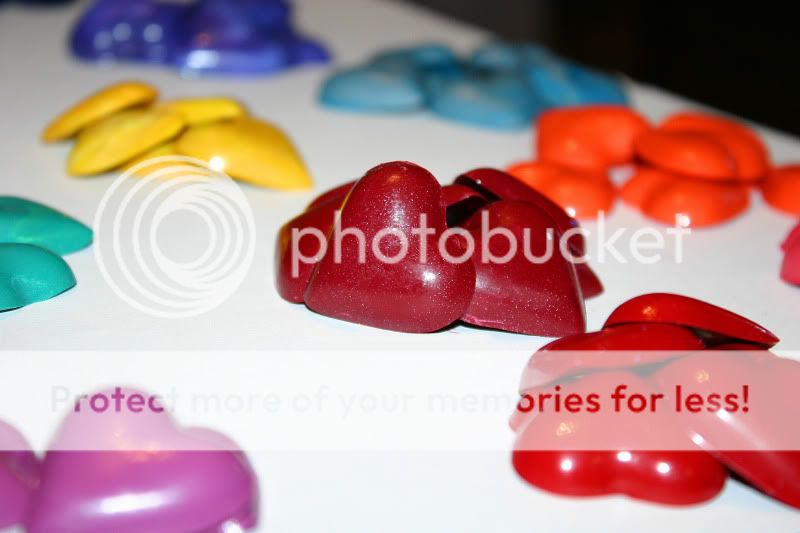
10. I like to separate them again into colors before assembling. I know a few little girls that would be pretty upset if pink was missing from their goodie bag.


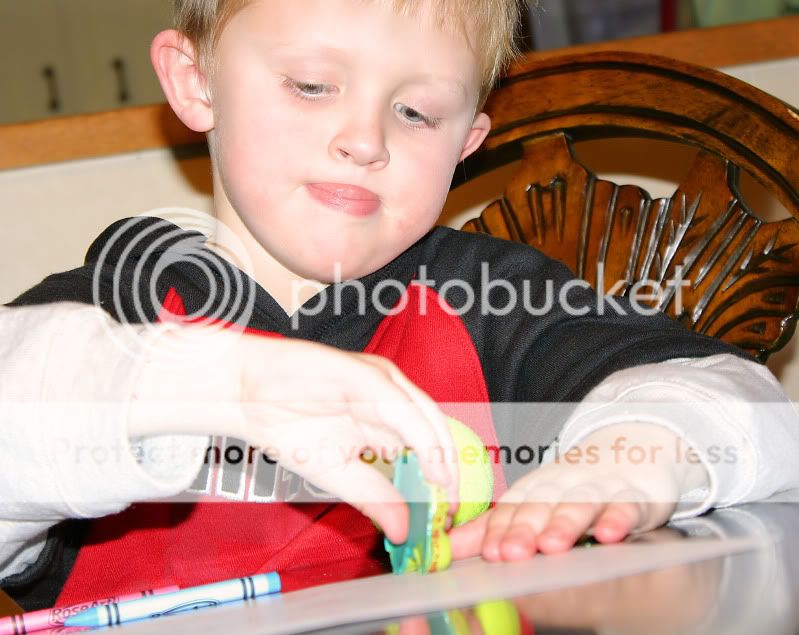
11. Testing is important and sticking out your tongue to concentrate is a very distinct family trait.

11. I then made this little graphic on the computer.

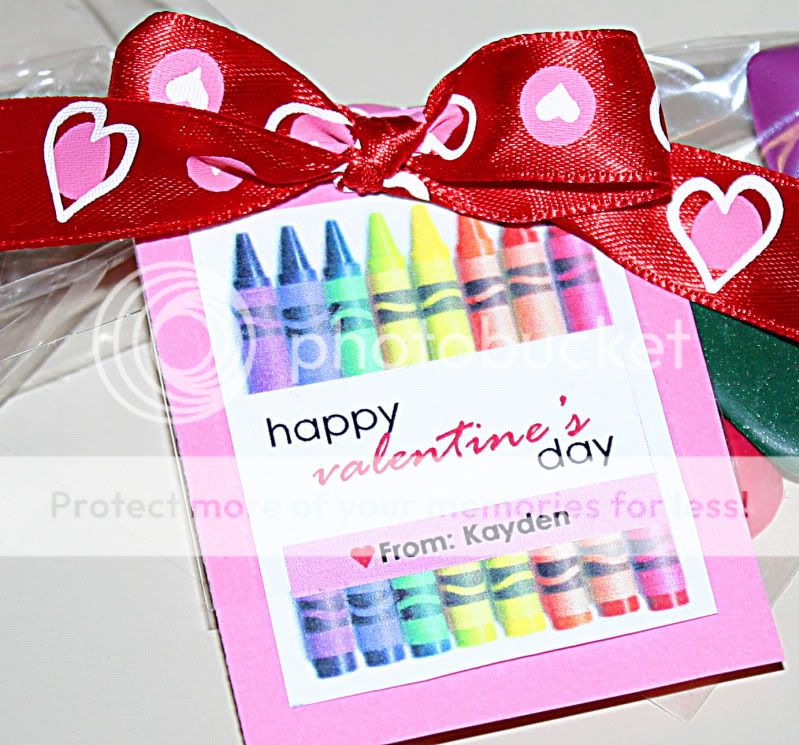
12. Divide crayons into the bags (I got 100 for $1.50 at Hobby Lobby in the Cake Section) and attach a special tag. Tie off with ribbon.


Final Thoughts: This was a fun project, easy to do, and I like that I had most of the supplies in the house already. Although it took far longer to finish than I thought, the lingering smell of the Crayola crayon spilled inside my oven will remind us for weeks of the fun shared while making Valentine's for Kayden's preschool class.

My SUPER FIND (so excited) is coming tomorrow.

Just added....


Please order by February 4 for Valentine's Day Arrival. Retail for $20, and worth every penny!